For data analytics, I use tools like Power BI, Tableau, and Python. However, MS Excel is still easily my go-to tool for quick analysis. And, the pivot table proves handy in this aspect. This article covers the top 5 features I find useful.
Grouping
Grouping is another form of “Divide & Rule”. Instead of analyzing complete data, we divide it into different groups and then analyze performance in parts. The pivot table makes this job easy. We can group number and date fields
It is a three-step process:
Step 1: Drag the required number field to Row field
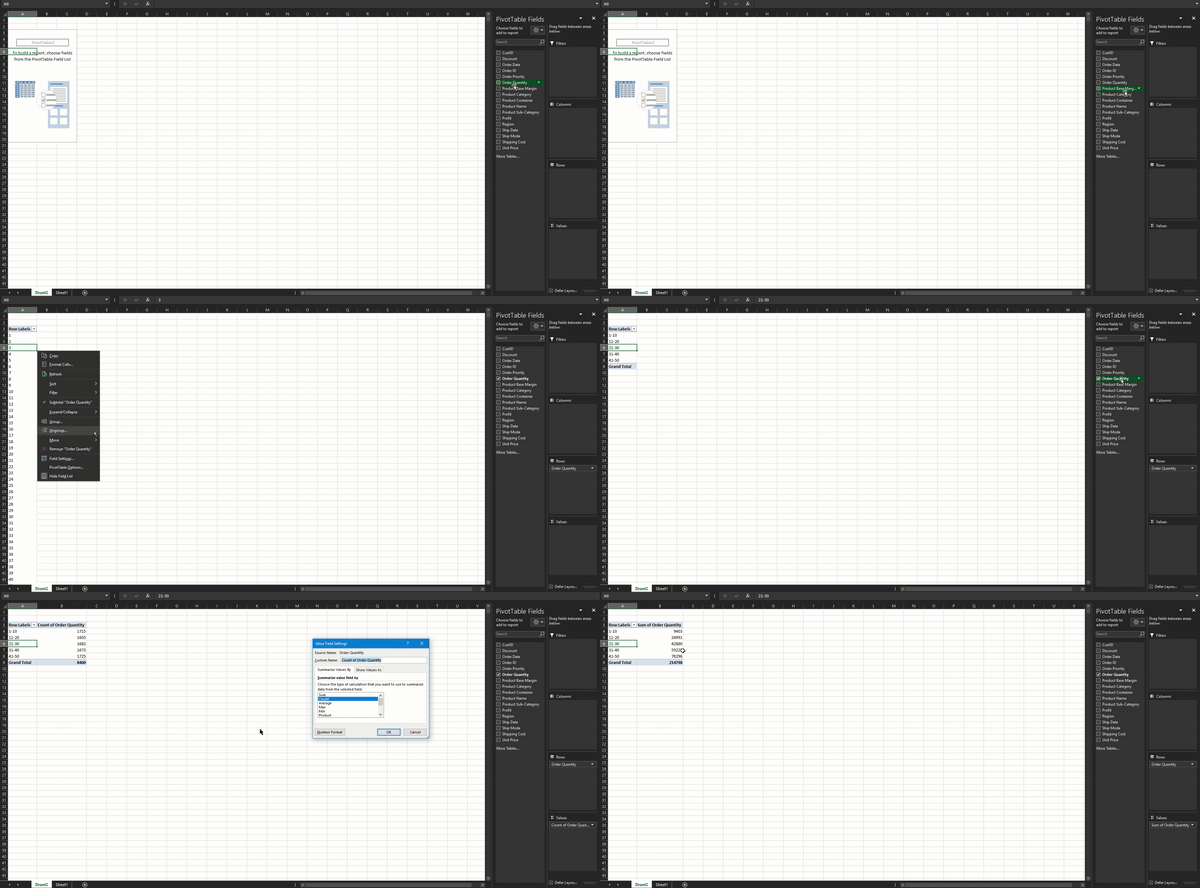
For this example, we create groups for Order Quantity. Add Order Quantity to Row section:

Step 2: Create Group
Right-click on any cell > Group

Step 3: Adjust the group setting
By default, the pivot table takes the minimum and maximum values as the starting and endpoints, respectively.

We can adjust this, as per requirement. Click Ok.
Pivot table creates a group on Order quantity, with each category length 10 units

Now, we can use it as a category field to analyze results:


Or, we can use it as a filter:

Another common grouping used is a grouping of a date field by Year, Quarter, and Month.

Date field grouped

Value Field Settings
Value Field Settings comes with a plethora of options that can improve efficiency significantly.
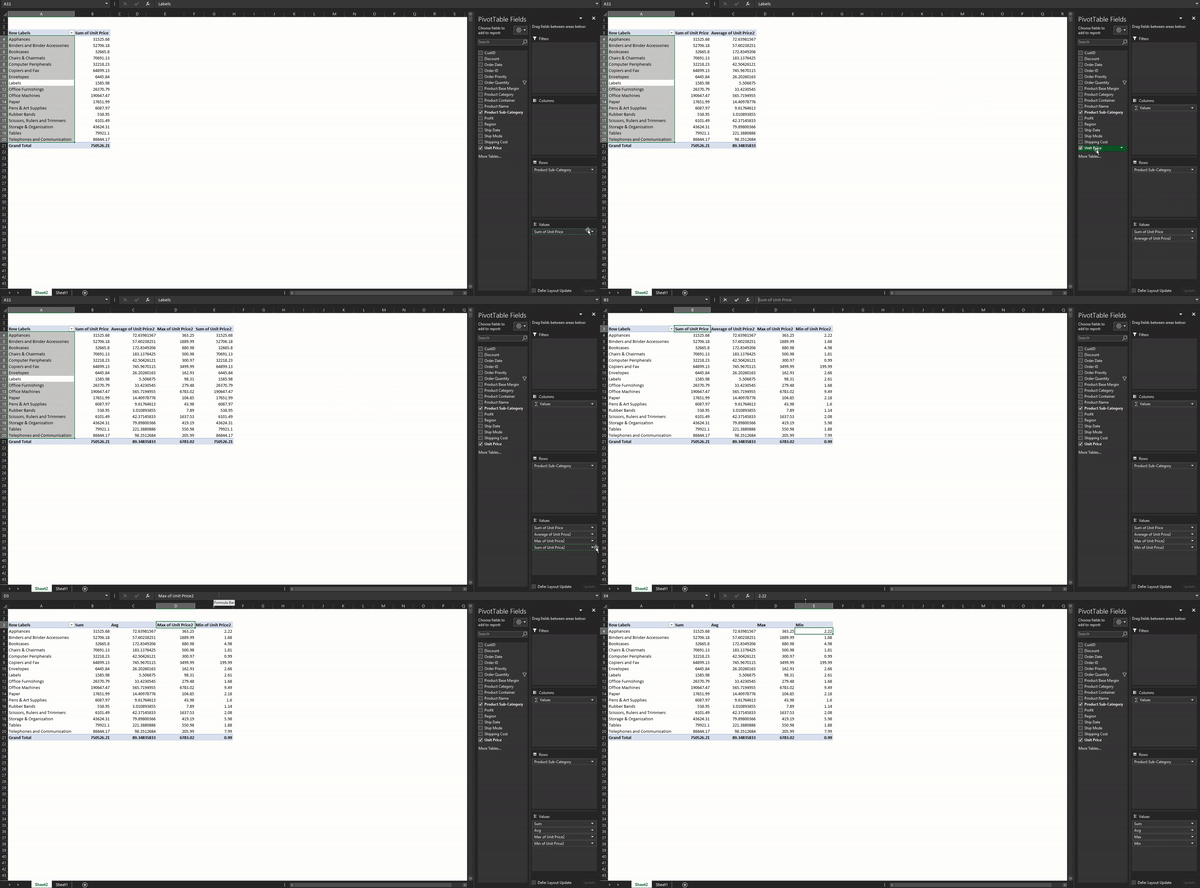
By default, when we drag a text/category field under Values, it shows applies count. In case of a number field, the pivot table applies sum aggregation:

We can use aggregations like minimum, maximum, average, standard deviation (for population & sample), variance (for population & sample), count number.
Just drag the number field under Values > Click on the Options drop-down > Value Field Settings
Summarize Values By > select the required calculation


Value Field Settings offers other in-built calculations like % of column or row, running total, rank, and more.
Please refer to the following article on more details on Value Field Settings
Top & Bottom N filter
Filtering with top & bottom rules comes handy in a pivot table. Consider the following design:

To display only top & bottom 3 products based on Ship Mode selection, we implement the following steps:
Click on the Drop-down option on Pivot table > Value Filters > Top 10

Update the setting box accordingly:

In case, we have multiple value fields, select the field on which we want to filter.
For Bottom 3, change the option from Top to Bottom:

Using a slicer, we can create a dynamic report with zero formulas.

Slicers & Timelines
Introduced with Office 2013, Slicers are a modern way of filtering a pivot table. It is more convenient to use and super-easy to add. Usually, we choose categorical data as a slicer. In this case, we are adding Ship Mode & Order Priority

How to add slicer in a pivot table?
Right-click on the field name > Add as Slicer

Alternatively, click on the pivot table we want to add slicer > Pivotable Analyze > Insert Slicer

It presents a list of all the fields in the table. Select the fields for which we want to add the slicer:

How to insert a Timeline in a pivot table?
It is identical to inserting a slicer.
Select the pivot table > PivotTable Analyze > Insert Timeline

Select the required date field


Tip: You can use Slicer setting to update the interaction settings:
Select the slicer > Slicer Option > Report Connection

Use the checkbox to connect or disconnect multiple pivot tables with the current slicer.

Power Pivot
Introduced with Excel 2013, Power Pivot is a robust tool. It is a little different from the usual pivot tables, as it works with relational data tables and has its language for calculation(DAX). When combined with Power Query, it provides an excellent capability of advanced data modeling in Excel. Following articles covers a few essential aspects of Power Pivot:
